

How To Repair Fender Rust
How to Repair a Rusty Fender on Your Auto, Truck, or SUV
Charles does a lot of things himself, including remodeling houses and RVs.
RUST is Not Your Friend!
Rust on your vehicle is a common occurrence, specially if you live in the Northeast like me. With the irresolute of the seasons and harsh Winters, the apply of common salt to combat icy roads and sidewalks wreak havoc on your daily driver. The salt, if not rinsed off afterwards driving effectually on the salt covered roadways, will speedily swallow away at the metal panels that make upward your vehicle. I created this article to assistance folks with the proper option of tools and materials needed to restore a rusted fender or body panel. I'one thousand pretty sure you volition exist able to save yourself some time and money if you are handy and tin follow unproblematic instructions. Follow forth with me and you lot volition find a tutorial that will enable you to repair that rust and brand your motorcar look like new again.
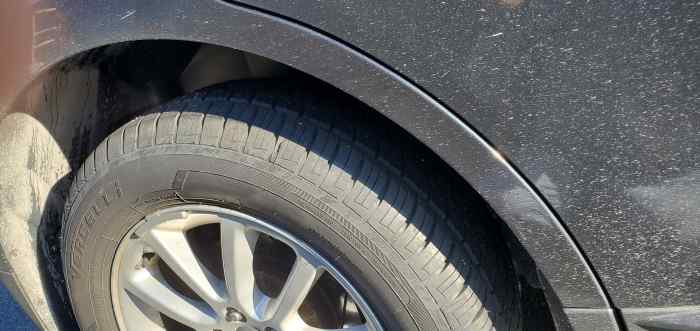
Rusty Fender on My 2008 Ford Edge Earlier Repair
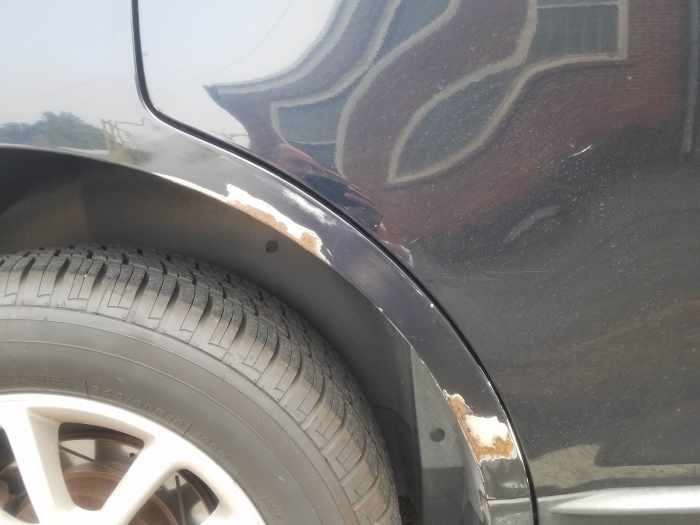
Before
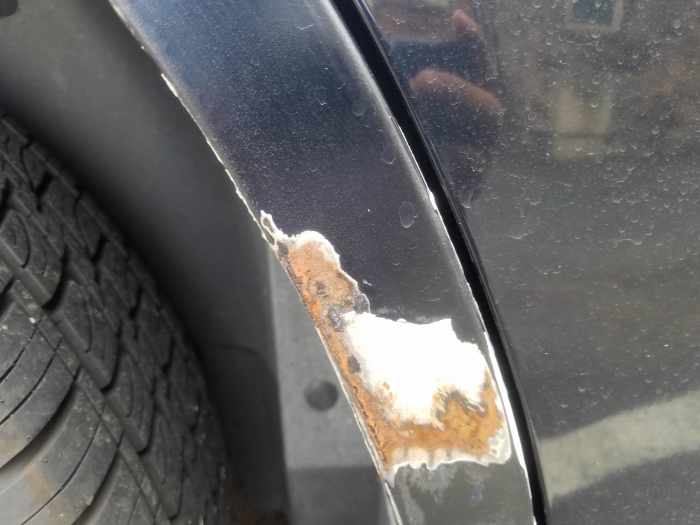
Earlier
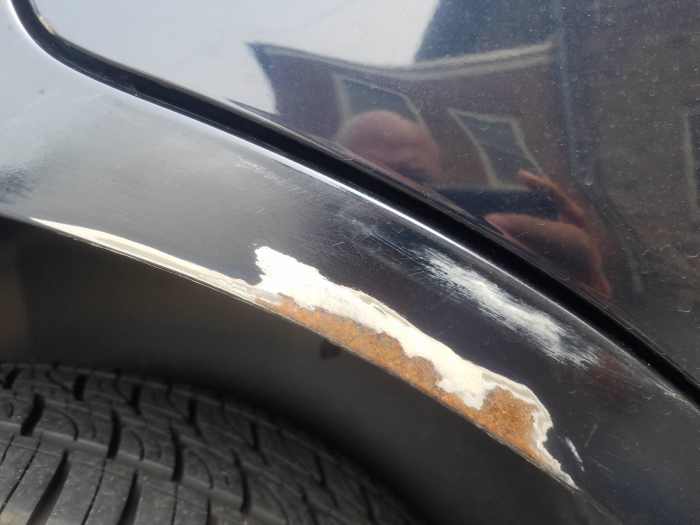
Before
Read More than from AxleAddict
The Repaired Fender
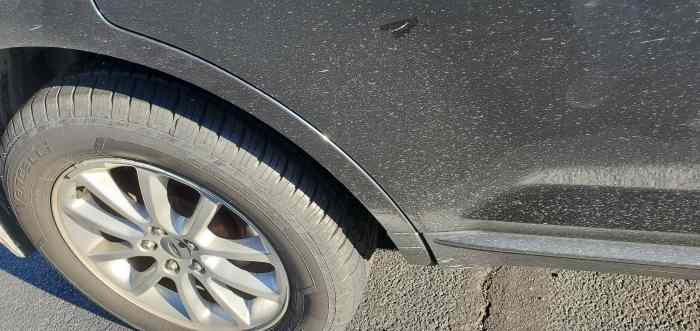
Subsequently
Step by Step Tutorial
1. Offset past cleaning the surface area to be repaired with soap and water followed by grease and wax remover applied with a soft cloth. I used Restoration Shop Custom Store Series KW-901. Allow to dry.
ii. With the 1" blue painters masking record, tape off the expanse, keeping the repair expanse as small-scale as possible.
iii. Sand the rusted surface area with 180-dust sandpaper until all signs of rust are gone and yous are left with shiny, bare metal.
4. Mix the body filler according to the instructions provided by the manufacturer.
5. Apply a sparse coat of the mixed body filler to the repair area. You will have to move quickly as the body filler volition begin to harden.
half-dozen. Permit the body filler to dry according to the manufacturer's instructions on the package.
7. In one case the trunk filler has dried completely, sand the filler with 80 grit sandpaper until by and large smoothen.
eight. Continue sanding the surface area with 180 grit sandpaper to remove heavy scratches from the lxxx-dust sandpaper.
ix. Finish sanding with 800 grit sandpaper applying h2o this time to remove the scratches left by the 180-dust sandpaper.
x. Rinse down the area and allow to dry. At this point, everything should be smooth and ready for the application of the sandable primer.
11. Utilise the primer in three thin coats allowing a few minutes in betwixt coats to prevent drips and runs. Allow to dry out for 30 minutes.
12. Lightly sand the primer with 800 grit sandpaper, applying water with the spray bottle until the area is smoothen.
xiii. Rinse the area and dry completely. Apply the wax and grease remover to the area with a soft cloth and let to dry completely.
fourteen. Utilize the color match pigment in 3 thin coats or until the primer is completely covered and no primer is showing. Allow the paint to cure for at least 30 minutes.
xv. Apply the clear coat in iii thin coats making sure to allow a few minutes between coats. Permit the clear coat to cure for at least 48 hours before moving on to the next step.
16. Once the clearcoat has had fourth dimension to properly cure, sand the clearcoat with 3000 grit sandpaper. Ensure that you sand in one direction, this will assistance when removing the fine scratches left backside.
17. With a DA polishing machine and a soft foam pad, apply a minor amount of the rubbing chemical compound and make 3 passes over the repair area and the side by side areas likewise.
18. Now apply the polishing compound in the same style as above.
nineteen. Wash and dry the entire vehicle and apply a glaze of your favorite wax or sealant. This should complete your repair and leave your vehicle looking new and protected for the next 6 months. Remember to apply wax or sealant every 6 months to a freshly washed vehicle.
Concluding Thoughts
Cheers for following forth with me! I hope that your repair went well, and your results are stellar. Delight feel gratis to share your comments below and include anything you feel I might have missed. Await for more than exciting vehicle repair articles in the future. Happy Travels!
Related Articles

Source: https://axleaddict.com/auto-repair/How-To-Repair-a-Rusty-Fender-on-Your-Car-or-Truck
Posted by: proctorsusecum44.blogspot.com
0 Response to "How To Repair Fender Rust"
Post a Comment